Rubrik
Integration
To integrate Storj with Rubrik, you will need to create S3 credentials in Storj and add them within Rubrik.
Requirements
- An active Storj account
- A bucket for use with Rubrik in your Storj instance
- An active Rubrik Security Cloud (RSC) account and installation
Create an Account
To begin, you will need to create a Storj account.
Navigate to https://www.storj.io/signup?partner=rubrik to sign up, or log in https://storj.io/login if you already have an account.
Create a Bucket
Once you have your Storj account you can create a bucket for your data to be stored in.
Navigate to Buckets on the left side menu.
Click New Bucket on the top right.
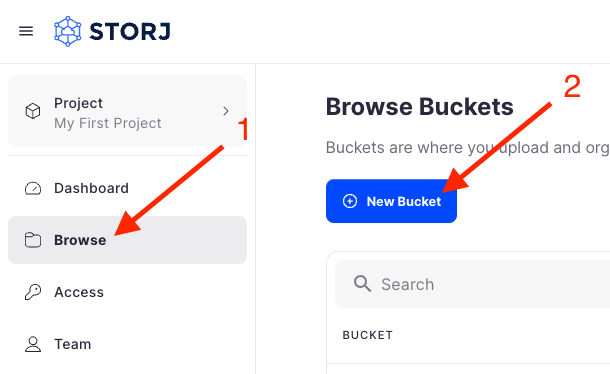
Assign the bucket an easily identifiable name, such as "my-bucket".

Click Create bucket
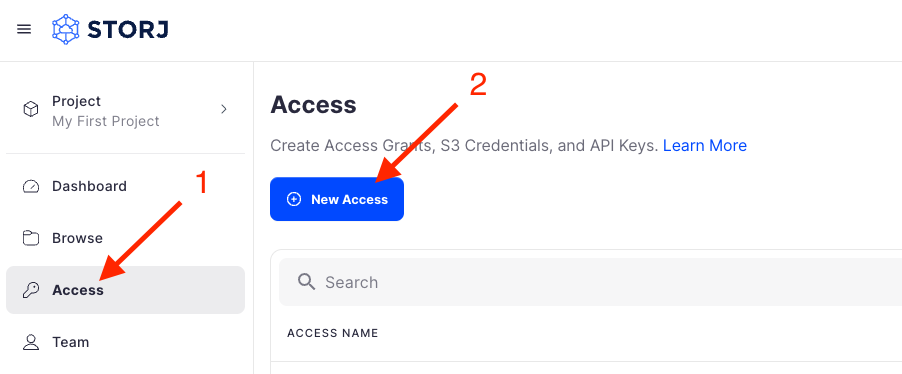
Generate S3 credentials
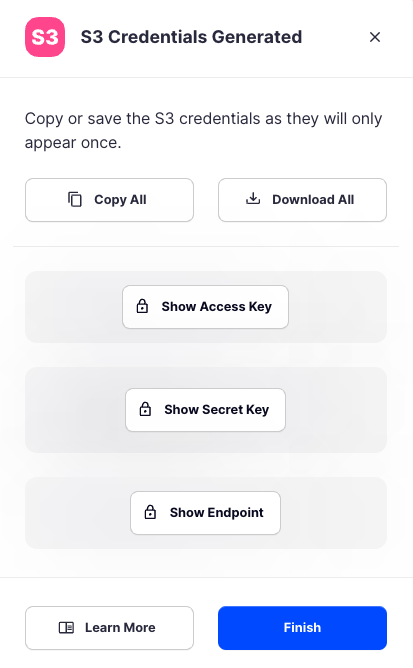
Storj has an Amazon S3 compatible API and you'll need generate S3 credentials to use it. S3 credentials consist of an access key, secret key, and endpoint.
Create S3 credentials in the Storj console:
Navigate to Access on the left side menu.
Click Create S3 Credentials under the S3 Credentials block.
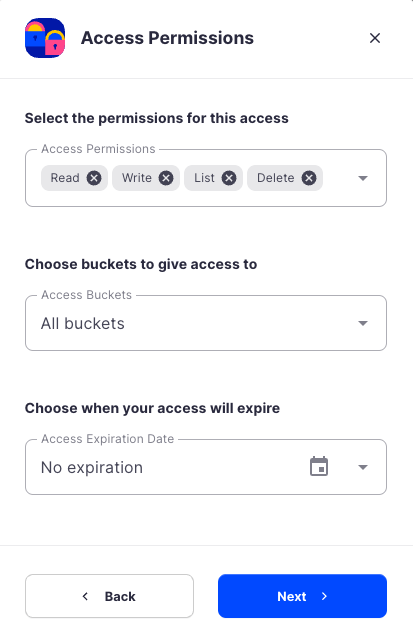
When the Create Access screen comes up, set specifications according to the following guidelines:
- Type: S3 Credentials
- Name: The name of the credentials (e.g. my-access)

Click Continue to provide permissions
- Permissions: All
- Buckets: Feel free to specify the bucket you created above (e.g. my-bucket), or leave as “All”
- End date: provide an expiration date for these credentials (optional)
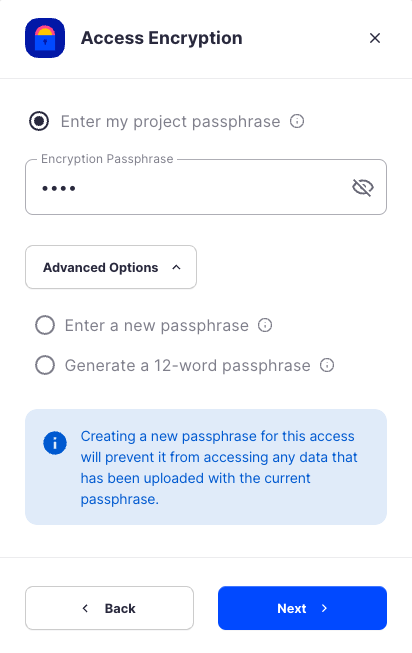
Click Continue to provide Access encryption Information
In order to see the data uploaded to your bucket in the Storj console, you must unlock the bucket with the same encryption passphrase as the credentials.
- Use the current passphrase: this is default option
- Advanced: you may provide a different encryption phrase either your own or generate a new one.
- Enter a new passphrase: use this option, if you would like to provide your own new encryption phrase
- Generate 12-word passphrase: use this option, if you would like to generate a new encryption phrase
Click Create Access to finish creation of your S3 credentials
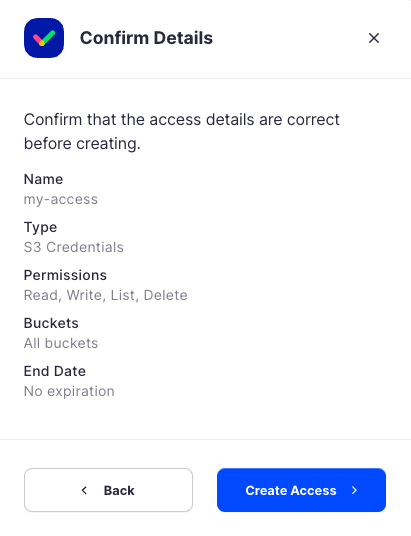
Click Confirm the Confirm details pop-up message
Your S3 credentials are created. Write them down and store them, or click the Download all button. You will need these credentials for the following steps.
Connecting Rubrik to Storj
Cloud Credentials Configuration
Log into your Rubrik Security Cloud (RSC) Account:

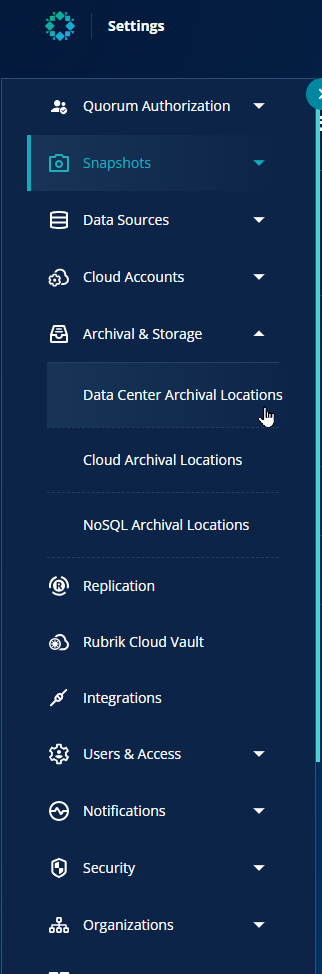
Go to Settings:

Go to the Archival & Storage dropdown and select Data Center Archival Locations:
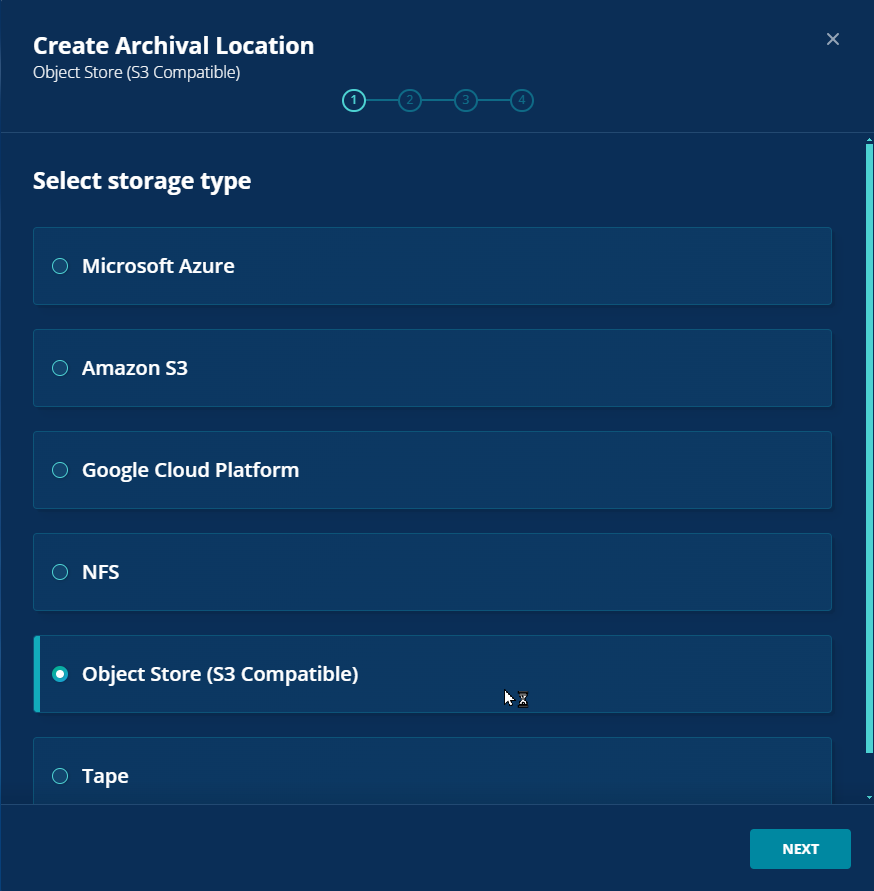
In Create Archival Location, select Object Store (S3 Compatible) and hit Next:
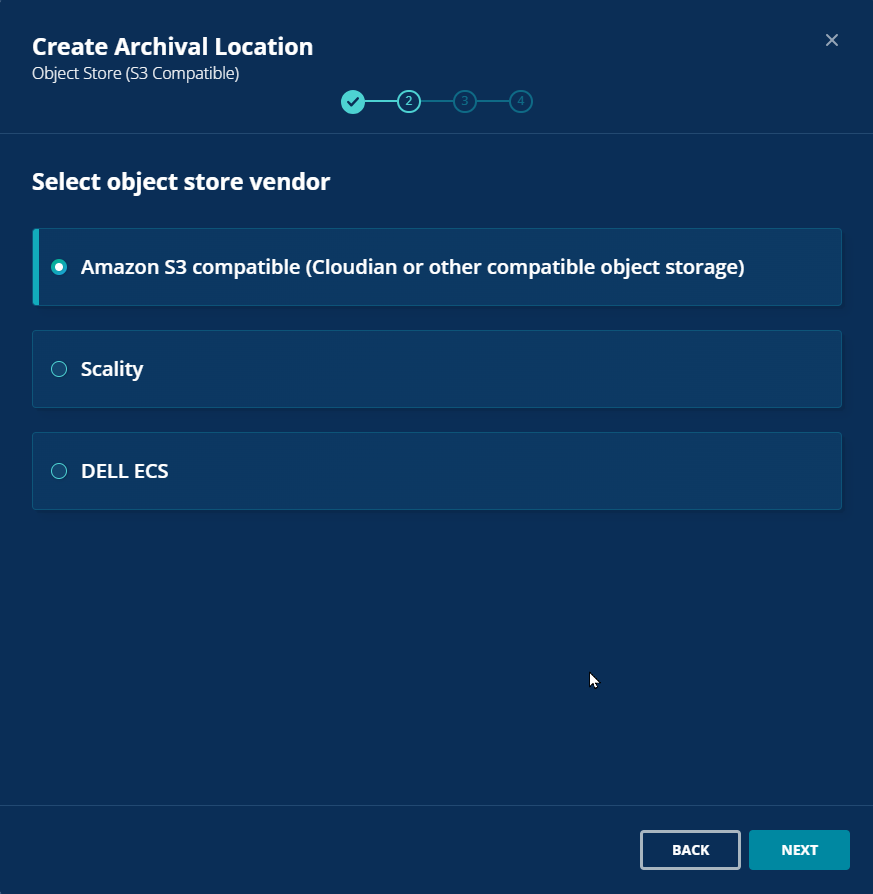
In Select object store vendor, select Amazon S3 compatible and hit Next:
Enter Storage Information and follow steps to add Archival Location:

Verify Archival Status:

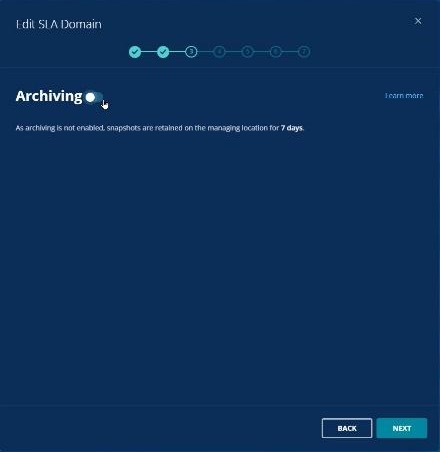
Create or Edit SLA and turn Archiving to On:
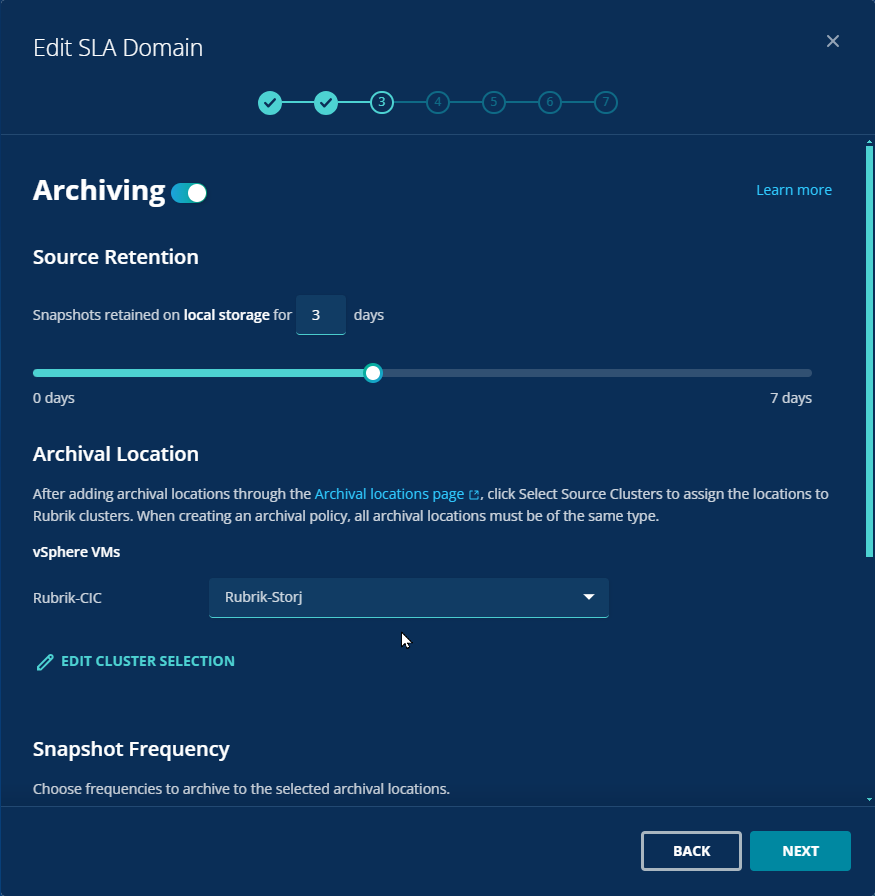
Select your Storj Archival Location:
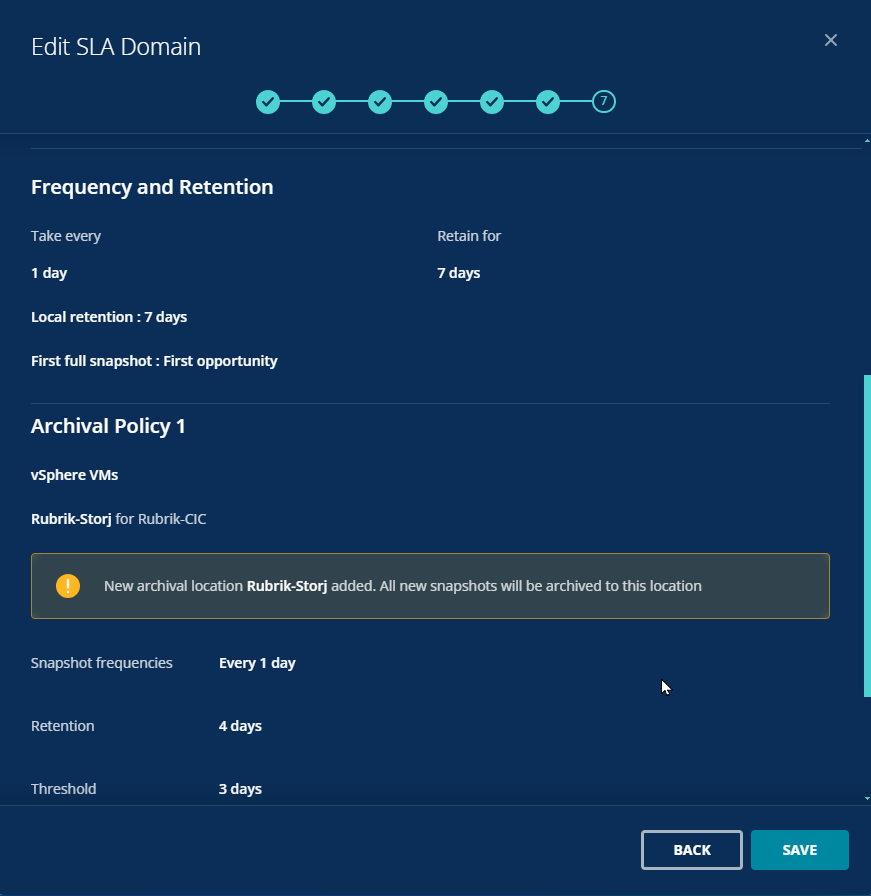
Select Archiving Policy:
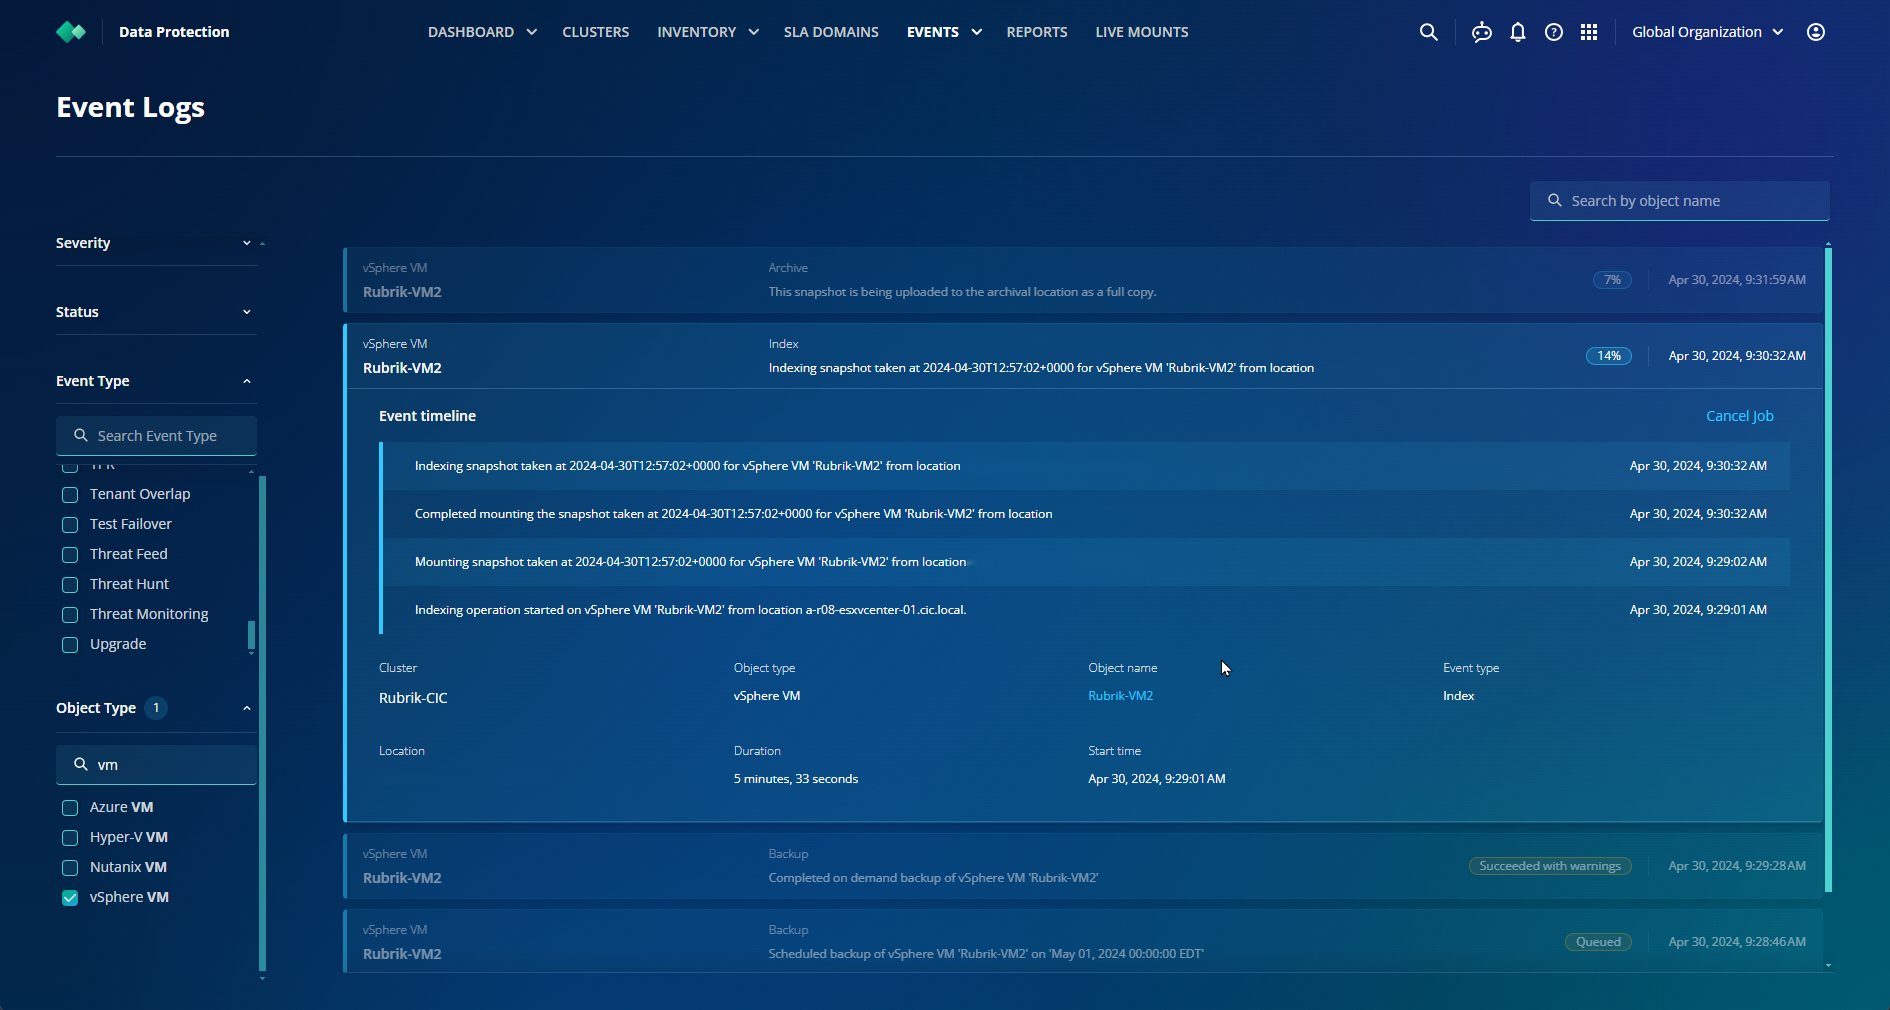
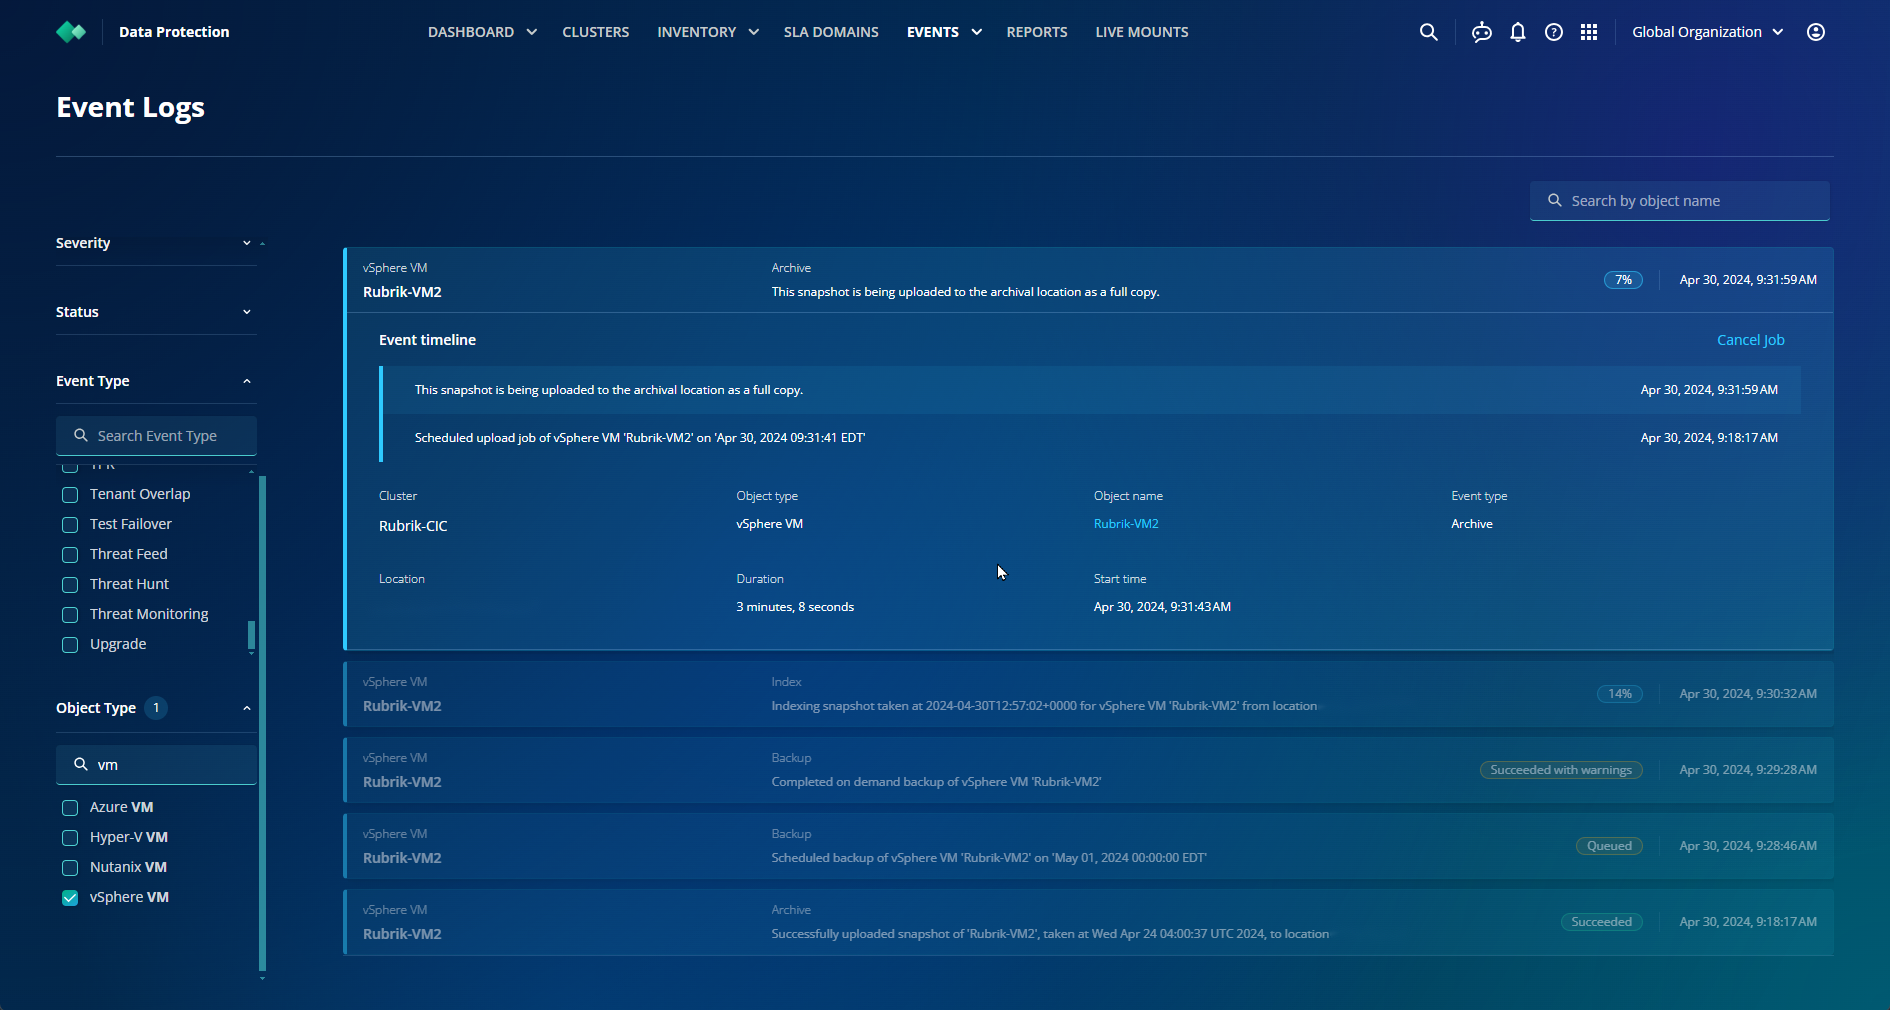
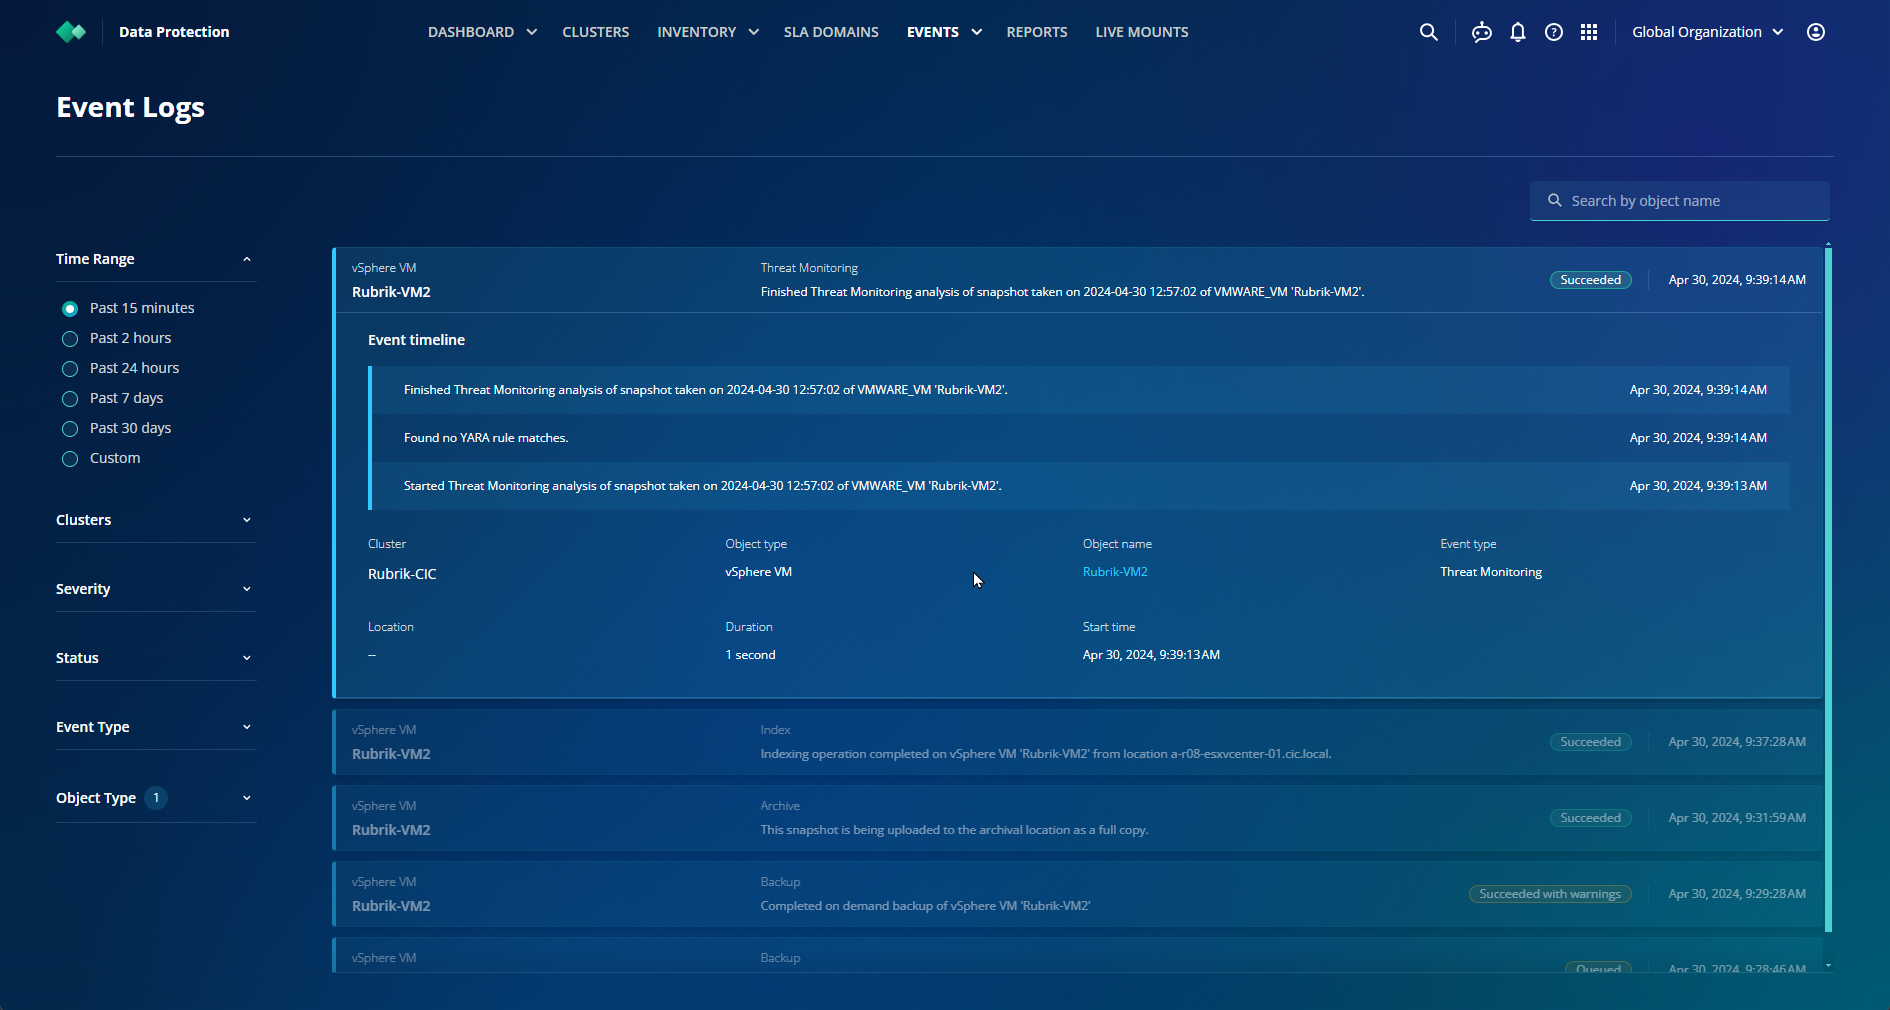
Assign SLA to VMs; Hosts; etc. and begin backup snapshots and archiving. You can view the Events tab in RSC to monitor backup snapshots and archiving.
Confirming backups via the Storj.io website
Once the backup snapshot indexing and Ransomware Threat Monitoring analysis (if enabled) are completed in RSC (you can view them in the events tab), Storj should look like this:

Everything is immutable and encrypted from within Rubrik:
