Globus
Integration guide for connecting Storj to Globus
Globus is a premier solution that empowers research by providing advanced data management capabilities. It offers data transfer, sharing, and discovery, all integrated into a unified, open-source platform. Globus ensures data security, seamless collaboration, and efficient management for individual researchers and larger research institutions.
Advantages of Globus with Storj
The synergy between Globus and Storj brings about a comprehensive data management solution at a competitive cost. Globus provides reliable data transfer and sharing tools for streamlined research processes, effectively integrating with Storj's S3 compatible storage for affordable storing and retrieval of vast datasets.
With Storj's cutting-edge security features, users can rest assured that their data managed on Globus is secure. Additionally, Globus offers metadata management, simplifying the handling and access of extensive datasets, while its efficient data sharing mechanisms help optimize storage costs.
Integration
The integration of Storj and Globus is facilitated via the S3 protocol, allowing Globus to directly write and read data to and from the Storj network. Users can configure the Globus endpoint to utilize Storj as the storage destination for their data.
To integrate Globus with Storj, you will need:
An active Storj account
Bucket(s) to be shared in the Globus ecosystem
Storj S3 compatible credentials
Globus Connect Server instance (see here)
Globus for AWS S3 Connector Subscription
Access to the Globus web interface for configuration and management
For more details, see https://www.globus.org/globus-connect.
Create a Storj Account
To begin, you will need to create a Storj account. If you already an account, go to https://storj.io/login.
Navigate to https://storj.io/signup to sign up. Enter your full name, email address, and a password, as shown below:

Create a Bucket
Once you have your Storj account you can create a bucket for your data to be stored in.
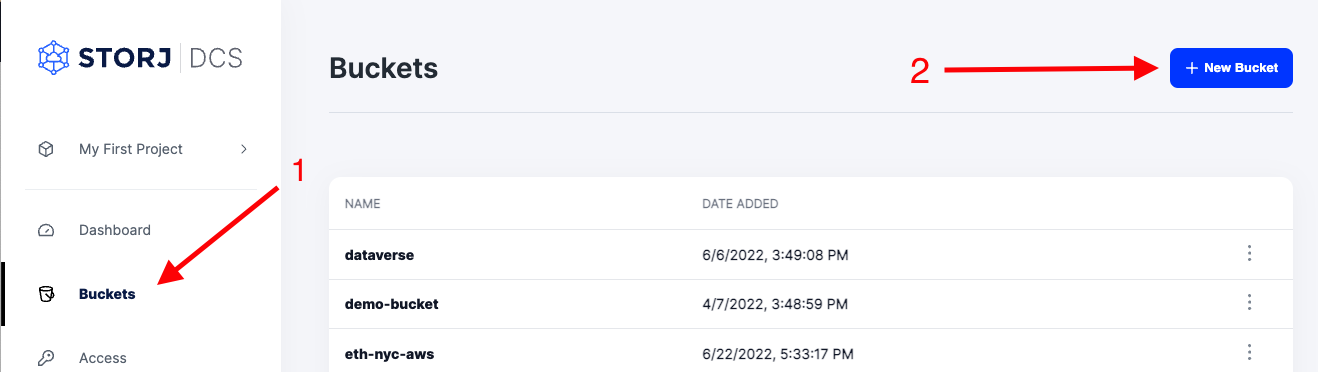
1. Navigate to “Buckets” on the left side menu.
2. Click “New Bucket” on the top right.
3. Assign the bucket an easily identifiable name, such as "my-bucket".
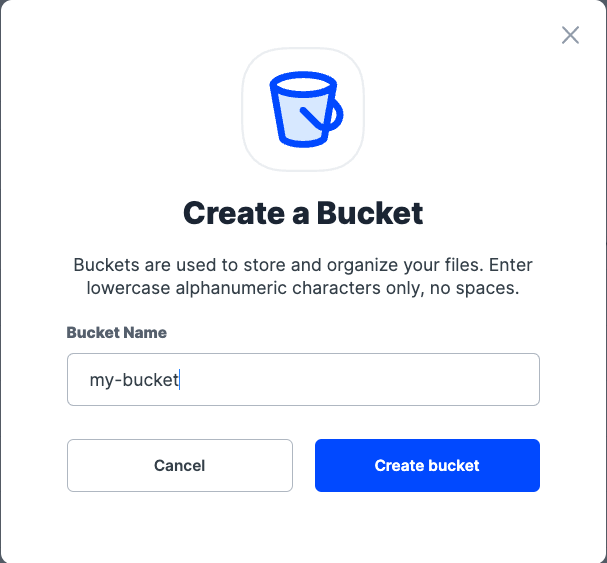
4. Click Create bucket
Generate S3 credentials
Storj has an Amazon S3 compatible API and you'll need generate S3 credentials to use it. S3 credentials consist of an access key, secret key, and endpoint.
Create S3 credentials in the Storj web console:
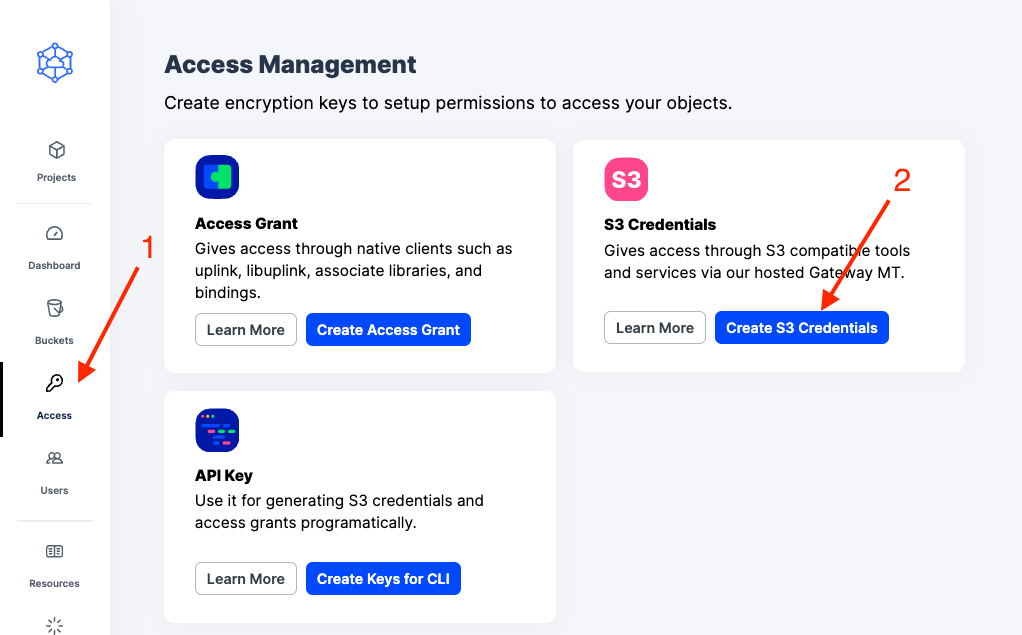
1. Navigate to Access on the left side menu.
2. Click Create S3 Credentials under the S3 Credentials block.
3. When the Create Access screen comes up, set specifications according to the following guidelines:
Type: S3 Credentials
Name: The name of the credentials (e.g. my-access)
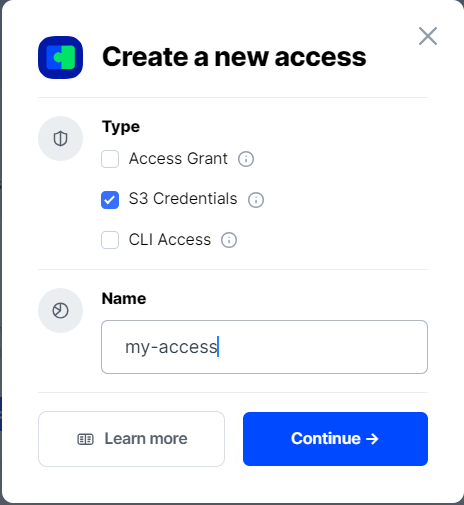
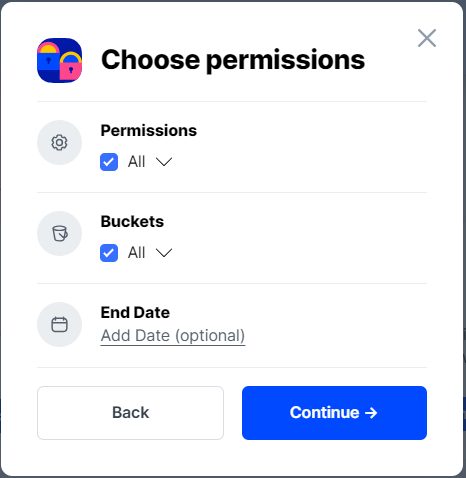
4. Click Continue to provide permissions
Permissions: All
Buckets: Feel free to specify the bucket you created above (e.g. my-bucket), or leave as “All”
End date: provide an expiration date for these credentials (optional)
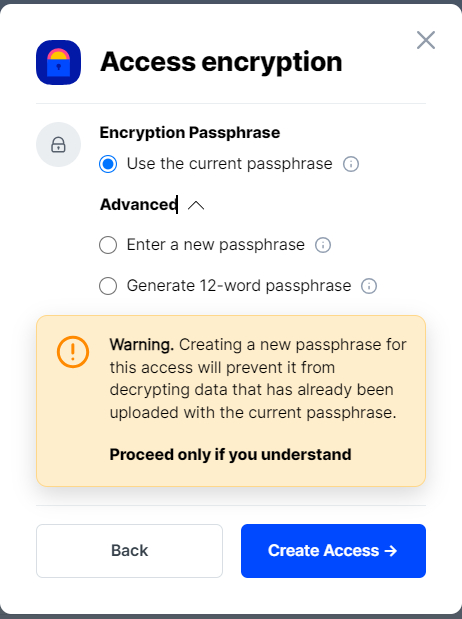
5. Click Continue to provide Access encryption Information
Use the current passphrase: this is default option
Advanced: you may provide a different encryption phrase either your own or generate a new one.
Enter a new passphrase: use this option, if you would like to provide your own new encryption phrase
Generate 12-word passphrase: use this option, if you would like to generate a new encryption phrase
In order to see the data uploaded to your bucket in the web console, you must unlock the bucket with the same encryption passphrase as the credentials.
6. Click Create Access to finish creation of your S3 credentials
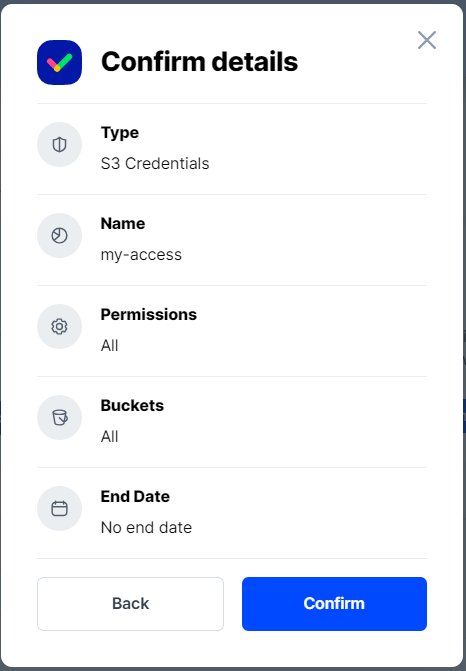
7. Click Confirm the Confirm details pop-up message
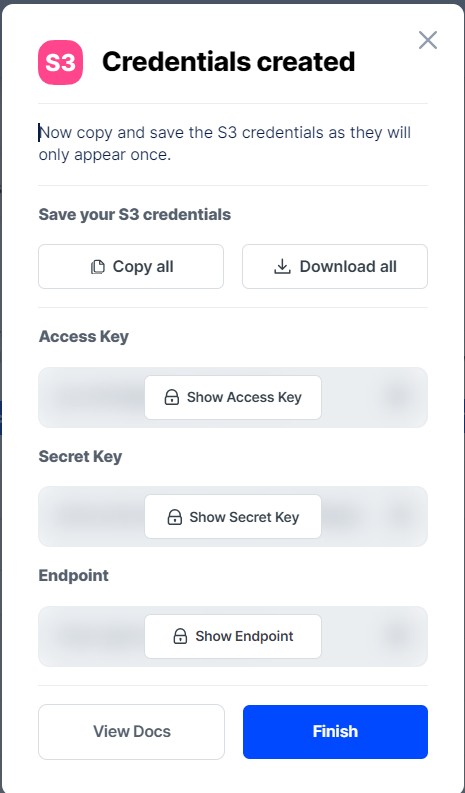
8. Your S3 credentials are created. Write them down and store them, or click the Download all button. You will need these credentials for the following steps.
Connecting to Storj via Globus S3 Storage Gateway
The Globus Storage Gateway allows for a seamless integration with Storj's S3 compatible storage, creating an efficient bridge between your local data storage and Storj's decentralized cloud service.
Enable the Globus for AWS S3 Connector
To enable the S3 connector follow the instructions here
Create S3 Storage Gateway
Next run globus-connect-server storage-gateway create s3, which initiates the process of creating a new S3 storage gateway.
Replace my-bucket with the one created previously in the command below. You can specify more than one bucket if needed. For more details see here.
The command will output a unique id to identify the gateway.
If you forget the id of a storage gateway, use the command globus-connect-server storage-gateway list to get a list of the storage gateways on the endpoint.
Create S3 user credential
First register user credentials with the Globus storage gateway using globus-connect-server user-credentials s3-create. For more details see here.
Follow prompts to input S3 Access Key and Secret Key (created previously)
Create collection
Create a collection (addition details here)
The STORAGE_GATEWAY_ID is from the previous step of “Create S3 Gateway”
Viewing the Collection with Globus File Manager
Enter the COLLECTION ID from the previous step
To be able to view collection follow the instructions here